Creating a timetable
Our top tips!
- Be realistic
It is important to make sure that you are realistic in your planning. Don’t give yourself too much to do in a short time. By planning ahead, you can make sure that you spread the work out evenly. - Commit – but don’t over commit
Once you’ve made your timetable, commit to it. That is why it is so important to make sure your planned workload is achievable. Don’t fill your day completely – factor in breaks, time to eat and time to do the things that you enjoy, all of which are important for having balance. - Make sure you take time to relax
Making sure that you take the time to relax while you are studying is really important. Read a book, watch TV and get fresh air. This will benefit your mental health and help you work more effectively.
Being organised is the best way to be...
Being organised is a skill that we have to learn over time, and it is definitely one of the most important and useful skills for you to develop. A great way to be organised, especially during exam and study periods, is by making a timetable and sticking to it.
If you have exams coming up, or you would just like to organise your time better, you may benefit from creating a timetable. Timetables can provide an effective means of organising your time and giving structure to your day.
It enables you to think realistically about what you can achieve each day and use your time as effectively as possible, balancing studying with your other commitments.
Once you have made a timetable, it is really important to stick to it. There is no point having a timetable if you will ignore it. To be able to keep to your time table, you need to be realistic with your timing and factor in breaks as well as time to do things that you enjoy.
Also make sure that you factor in time to eat, sleep, go to school and spend time with family and friends. If you factor time in for yourself, you will be more likely to stick to the study times that you have chosen.
Below, you can find a guide on how to make an effective timetable in seven steps. If you have further questions on making timetables, get in touch with us.
Step 1: Write a list of everything you need to do
The first thing you need to do when making a timetable is write down a list of every single task you need to do. This to-do list will help you see how much you have to do, but also how long you will need to finish it all.
Some people will prefer to do this on paper, while others will prefer for it to be digital. Digital to-do lists can be useful for moving around your tasks as needed: try using Microsoft Word, Workflowy or Todoist.
Step 2: Categorise your to-do list
This one might not seem important, but categorising your to-do list will help you to see how much you have to do for each of your subjects or modules. You can also categorise by importance, giving tasks labels such as ‘must do’, ‘should do’, ‘could do’. This can be especially helpful if you have a lot of tasks and are struggling to figure out where to start.
You might want to group similar small tasks together. Grouping such tasks helps you avoid taking up a whole slot in your timetable with a five-minute task. If you think a task is going to take less than 20 minutes, it is often most efficient to group it with another similar task if possible.
Step 3: Figure out which tool you will use to create a timetable
Online calendars (such as Google Calendar) allow you to plan your time minute by minute and will notify you when you are meant to be doing certain tasks. For some people, this can be too intense.
If you prefer to use your timetable as a guide rather than a strict plan, making a table in Microsoft Word or Microsoft Excel can work just as well.
Step 4: Create your timetable
If you choose Microsoft Word or Microsoft Excel, you need to create your timetable yourself. Put the date or day of the week across the top row and put the time down the first column in either 15-minute, 30-minute or one-hour intervals, starting at whatever time you plan on getting on with your day.
If you choose an online calendar like Google Calendar or the one on your phone, make sure you actually have access to that calendar. For example, if you choose to use Google Calendar, make sure you have a Google account.
DO NOT forget to save time for breaks!
Step 5: Put the events in first
These are the things you can’t move such as school, online classes, jobs, extracurriculars, meetings and social plans. Put these in your timetable first so that you can put your tasks around these events.
Remember to put in events such as breakfast, lunch and dinner – this will break up your tasks and ensure you don’t forget to eat!
Step 6: Place your tasks into the timetable
Finally, put the tasks into your timetable by choosing things on your to do list and placing them on the timetable where you think they will fit best. You might need to shuffle things around to get your tasks to fit.
Remember to tick things off your to-do list once they have been placed into the timetable so you don’t miss anything, and remember to leave gaps for study breaks!
(Optional) Step 7: Set yourself deadlines for the bigger tasks
Putting deadlines on your timetable for bigger tasks will hold you accountable and keep you from procrastinating (an easy trap to fall into!).
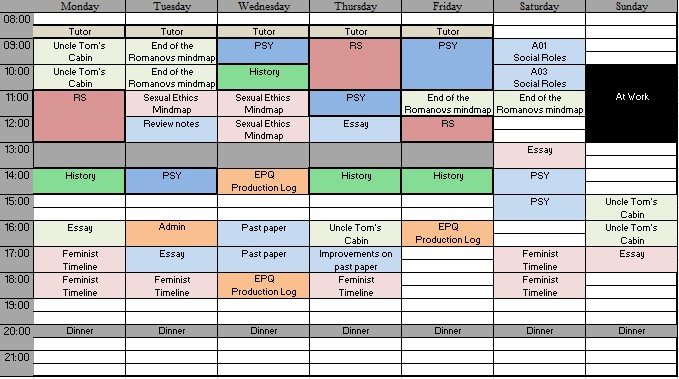
An example timetable...